
Introduction
The final part of the music-making process for any producer (after the many hours spent polishing the arrangement, tweaking the mix and referencing on every speaker you can find!) is sending the finished mix away for mastering. But before you export your mix, there are a few things worth checking to ensure that your mastering engineer receives the best possible version of your music.
Having worked as a mixing and mastering engineer for over thirteen years now, I’ve encountered all kinds of approaches to preparing tracks for mastering, along with plenty of misconceptions about how the process works.
Fortunately, preparing your mix for mastering is pretty straightforward. You don’t need to follow a byzantine set of rules or aim for some magical peak level. A little preparation and a basic understanding of digital audio will go a long way towards helping your mastering engineer get the best possible result.
Bit Depth & Sample Rate
Let’s start with the format your mix should be delivered in.
Ideally, you should export your premaster as a 24-bit WAV file, using the same sample rate that your track was originally recorded or produced at. If you’ve been working at 44.1kHz, there’s no benefit in exporting at 96kHz, as increasing the sample rate won’t magically add detail that wasn’t present to begin with.
32-bit floating point WAV files are also perfectly suitable for mastering, although 24-bit is more than adequate for most applications. Lossless formats such as FLAC are fine too, provided your mastering engineer is happy to work with them.
One thing I’d strongly recommend avoiding is sending MP3s or other lossy audio files. Lossy compression reduces file sizes by permanently discarding audio information. This can introduce unwanted artefacts, particularly around transients and high frequencies, and lead to a ‘watered down’ sound. The heavier the compression, the more obvious these issues can become.
Crucially, once this information has been discarded, you can’t get it back by converting the file to WAV. You’ll simply end up with a larger file containing the same compromised audio.
However, there are exceptions. If you’ve lost your session files or only have an MP3 of an older production, your mastering engineer might still be able to help. It’s perfectly possible to master a lossy file, but having a conversation beforehand will let them know exactly what they’re working with.
Headroom & Loudness
This aspect of preparing a mix for mastering is the one I get asked about the most.
The accepted wisdom online is that premaster files must peak at -6dBFS. Whilst leaving headroom for your engineer to work with is sensible, there’s absolutely nothing special about that number.
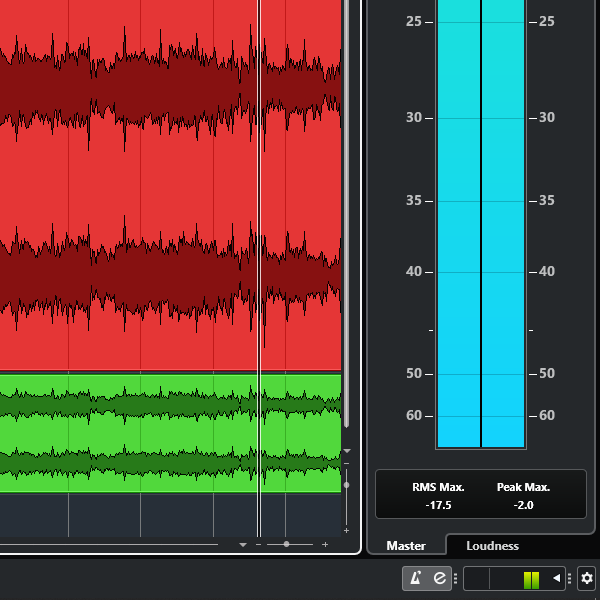
In fact, a premaster peaking at around -2dBFS is absolutely fine, so long as the audio isn’t clipping or suffering from unwanted distortion.
Your mastering engineer can adjust the level of your mix within their DAW with a high degree of accuracy. Turning a clean premaster up or down by a few dB isn’t going to have any noticeable effect on audio quality.
Technically, exporting a quieter file at a fixed bit depth means using slightly less of the available numerical resolution. However, at 24-bit, the difference between peaks at -6dBFS and -2dBFS is completely insignificant in practical terms.
The important thing is to avoid clipping and leave some sensible headroom for the engineer to work with. You don’t need to chase a mythical peak figure or make your premaster as loud as a finalised commercial release.
One last thing: turning down a mix that’s already been clipped won’t undo the damage. If the distortion is already baked into the audio, reducing its level won’t make it disappear.
Master Bus Processing
Another important point to consider is whether you should leave processing on your master bus before exporting your finished mix.
My preference is to receive the mix with no EQ, compression, saturation, clipping or limiting applied to the master bus.
That's because these processes can restrict the options available during mastering. Heavy compression or limiting, for example, can alter transients and dynamics in ways that are very difficult, if not impossible, to undo afterwards.
However, there's a difference between processing used to make a demo louder and processing that's fundamental to the sound of your mix. If you've been mixing into a bus compressor from the start of the project, removing it at the last minute might well change the balance, movement and tone of the track. Likewise, a little saturation across the master bus might be an integral part of the sound you're crafting.
In these situations, it's worth speaking to your mastering engineer and sending both processed and unprocessed versions of the mix. This allows them to hear what you're trying to achieve whilst giving them the option of choosing the best starting point.
The same applies if you've been using a limiter or processing chain to make a loud test mix for DJ sets, or simply to hear how the mix stands up to that kind of processing. Sending that version as a reference alongside a clean premaster can help the engineer understand the final loudness and tone you're looking to achieve.
Ultimately, discussing your approach with your mastering engineer and agreeing which versions to send is far more useful than blindly following online advice that all master bus processing is bad.
Top & Tail
Obvious, I know, but make sure you’re exporting the full track! It’s very easy to accidentally cut off the beginning of a transient or truncate the end of a song when setting your export markers.
When exporting, make sure you’ve included the very beginning of the track, particularly if there’s an effect, reverse sound or fill leading into the first beat. Similarly, allow any reverb, delay or synth tails at the end to decay fully into silence.
There’s no need to trim the mix down at your end, as your mastering engineer will take care of the final fades and trimming.
File Naming & Track Information
A little organisation here can save time and prevent mistakes, especially when multiple mixes or revisions are involved.
At the very least, your file should include the artist's name (or names), track title, mix version and BPM.
For example:
Artist Name - Track Title - Mix v1 - 174bpm.wav
I find knowing the song’s BPM particularly useful, as setting my DAW to the track’s tempo allows me to lock automation to the grid. This makes it easier to automate limiting parameters for different sections of the song, for example.
Additional information such as the releasing label, musical key and specific version requirements can also be handy. It's well worth mentioning whether you need alternative versions such as instrumentals, clean edits or radio edits, alongside any deadlines or delivery requirements.
The more useful information your mastering engineer has, the easier it will be for them to deliver what you need correctly and on time.
Reference Tracks
If there’s a specific sound you’re aiming for, reference tracks can be extremely helpful for your engineer. Perhaps you particularly like the bass weight of a DnB release, the dynamics of your favourite new garage track or the overall tone of an album you admire.
If you have high-quality WAV or FLAC copies of these references, it’s worth sending them alongside your premaster. Otherwise, links to the tracks on streaming or download platforms are perfectly acceptable.
It’s helpful to explain exactly what you like about the reference too. Simply sending a track without any context can leave your mastering engineer guessing whether you’re interested in its loudness, tonal balance, stereo image or something else entirely.
Finally, don't forget to mention any specific concerns you have about your own mix. If you’re unsure about the sub frequencies, think the vocals might be a bit harsh or have deliberately made a sound too loud, let the engineer know. After all, good communication can be just as valuable as good preparation.
Final Checks
A great tip is to import your final mix into a blank DAW project and listen to the exported file from beginning to end. Don’t just assume that because everything sounded fine inside your DAW, the export will be correct.
Incorrect export settings, missing processing or accidentally muted channels can all lead to unexpected problems. It’s also worth taking one final listen to the mix itself. Are you 100% satisfied with the balance of the instruments? Does the low end hit as you’d like it to? Are the vocals sitting at the right level?
Mastering can make a good mix sound great, but significant problems with individual elements are best addressed during the mixing process.
Finally, double-check you’re sending the correct version. Nobody wants to discover they’ve mastered an older mix when the latest version was sitting in another folder!
Final Thoughts
Preparing your mix for mastering really can be straightforward. If you’ve got a clean, properly exported audio file that sounds the way you intend, then you’re already most of the way there.
Don’t worry about internet chatter regarding exact peak levels and forget trying to make your mix sound like a finished master before submitting it. That’s what your mastering engineer is there for.
Any reputable mastering engineer will have their own preferred workflow, so if you’re ever unsure about file formats, master bus processing or anything else, just ask for their opinion.
It’s simple really: give your mastering engineer the best possible starting point, along with clear instructions on what you’re looking to achieve, and they’ll be in a great position to deliver a finished master that shows your music in the best possible light.